


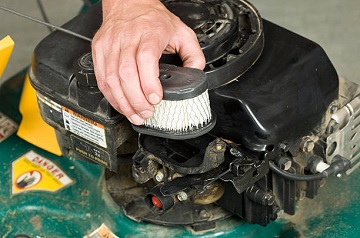
Air Filter Replacement in Lawn Mower – A Complete Guide
Proper lawn mower maintenance is the key to its long-lasting and reliable operation. One of the essential components that requires regular checking and replacement is the air filter. The air filter prevents contaminants and particles from getting into the engine, which can lead to its damage. In this article, you'll learn how to properly replace the air filter in a lawn mower.
Why is air filter replacement important?
- Ensures optimal engine performance.
- Protects the engine from damage and premature wear.
- Helps save fuel and reduces exhaust emissions.
When to replace the air filter? It's recommended to check the filter every 25 hours of lawn mower operation or at least once a year, whichever comes first. If you frequently use the mower in dusty or dirty conditions, checks should be more frequent.
Step-by-step – How to replace the air filter in a lawn mower?
Preparation: a. Ensure that the mower is turned off and cooled down. b. Disconnect the ignition wire from the spark plug to prevent accidental start-up.
Access the filter: a. Unscrew the air filter cover. b. Remove the old air filter.
Check the new filter: a. Make sure the new filter is suitable for your mower model. b. Examine the filter for any damages or flaws.
Installing the new filter: a. Insert the new filter into its casing. b. Screw the cover back on.
Conclusion: a. Connect the ignition wire to the spark plug. b. Check if the mower starts easily and operates correctly.
Summary: Regular air filter replacement is a simple, yet crucial step in keeping your lawn mower in top condition. Ensuring clean air supplied to the engine will extend the life of your equipment and guarantee its optimal performance.