


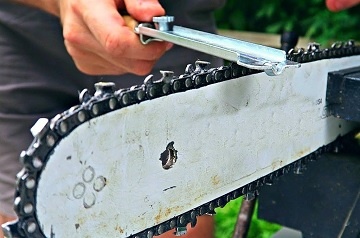
Chain Replacement in a Chainsaw
Replacing the chain in a chainsaw is an essential part of maintenance and care for the tool. A sharp chain ensures efficient and safe cutting. If the chain is dull, damaged, or broken, it needs to be replaced. Here are the steps to properly replace the chain in a chainsaw:
-
Safety First
- Make sure the chainsaw is turned off.
- Disconnect the ignition wire from the spark plug to prevent accidental starting of the saw.
- Wear protective gloves.
-
Opening the Chainsaw Cover
- Using the appropriate wrench (often included with the chainsaw), unscrew the nuts or bolts that hold the cover, beneath which are the chain and guide bar.
-
Removing the Old Chain
- Loosen the chain tension using a wrench, turning the appropriate screwdriver or knob to the left.
- Now you can remove the old chain from the guide bar, starting from the top of the guide bar and continuing around the bottom part.
-
Checking the Guide Bar
- Before putting on a new chain, it's worth checking the guide bar for wear or damage. If the guide bar is warped or has deep grooves, consider replacing it.
-
Installing the New Chain
- Place the new chain on the guide bar, starting from the bottom part of the guide bar and working towards the top end.
- Make sure the cutting teeth of the chain are facing forward on the top part of the guide bar.
-
Adjusting the Tension
- After installing the chain, tighten it using a wrench, turning the appropriate screw or knob to the right.
- The chain tension is correct when the chain sits snugly against the guide bar, but it can still be manually moved around the guide bar.
-
Closing the Chainsaw
- Replace the cover and tighten the securing nuts or bolts.
-
Test
- After installing the new chain and assembling the chainsaw, start it and test if the chain operates correctly.
When replacing the chain in a chainsaw, always remember to take precautions. Regularly checking the condition of the chain and replacing it when necessary will ensure a long life for your tool and safety during work.